Showing posts with label Dessert. Show all posts

Saturday, February 22, 2014

Gluten-free Quinoa Chocolate Cake

Thank you, Universe, for introducing me to this tasty gluten-free chocolate cake!  Actually, who I should really be thanking is Sarah of the blog "making thyme for my health". This recipe is more than I could have ever hoped for in a gluten-free dessert.  It's rich and chocolaty. It's moist and delicious.  It's heaven.

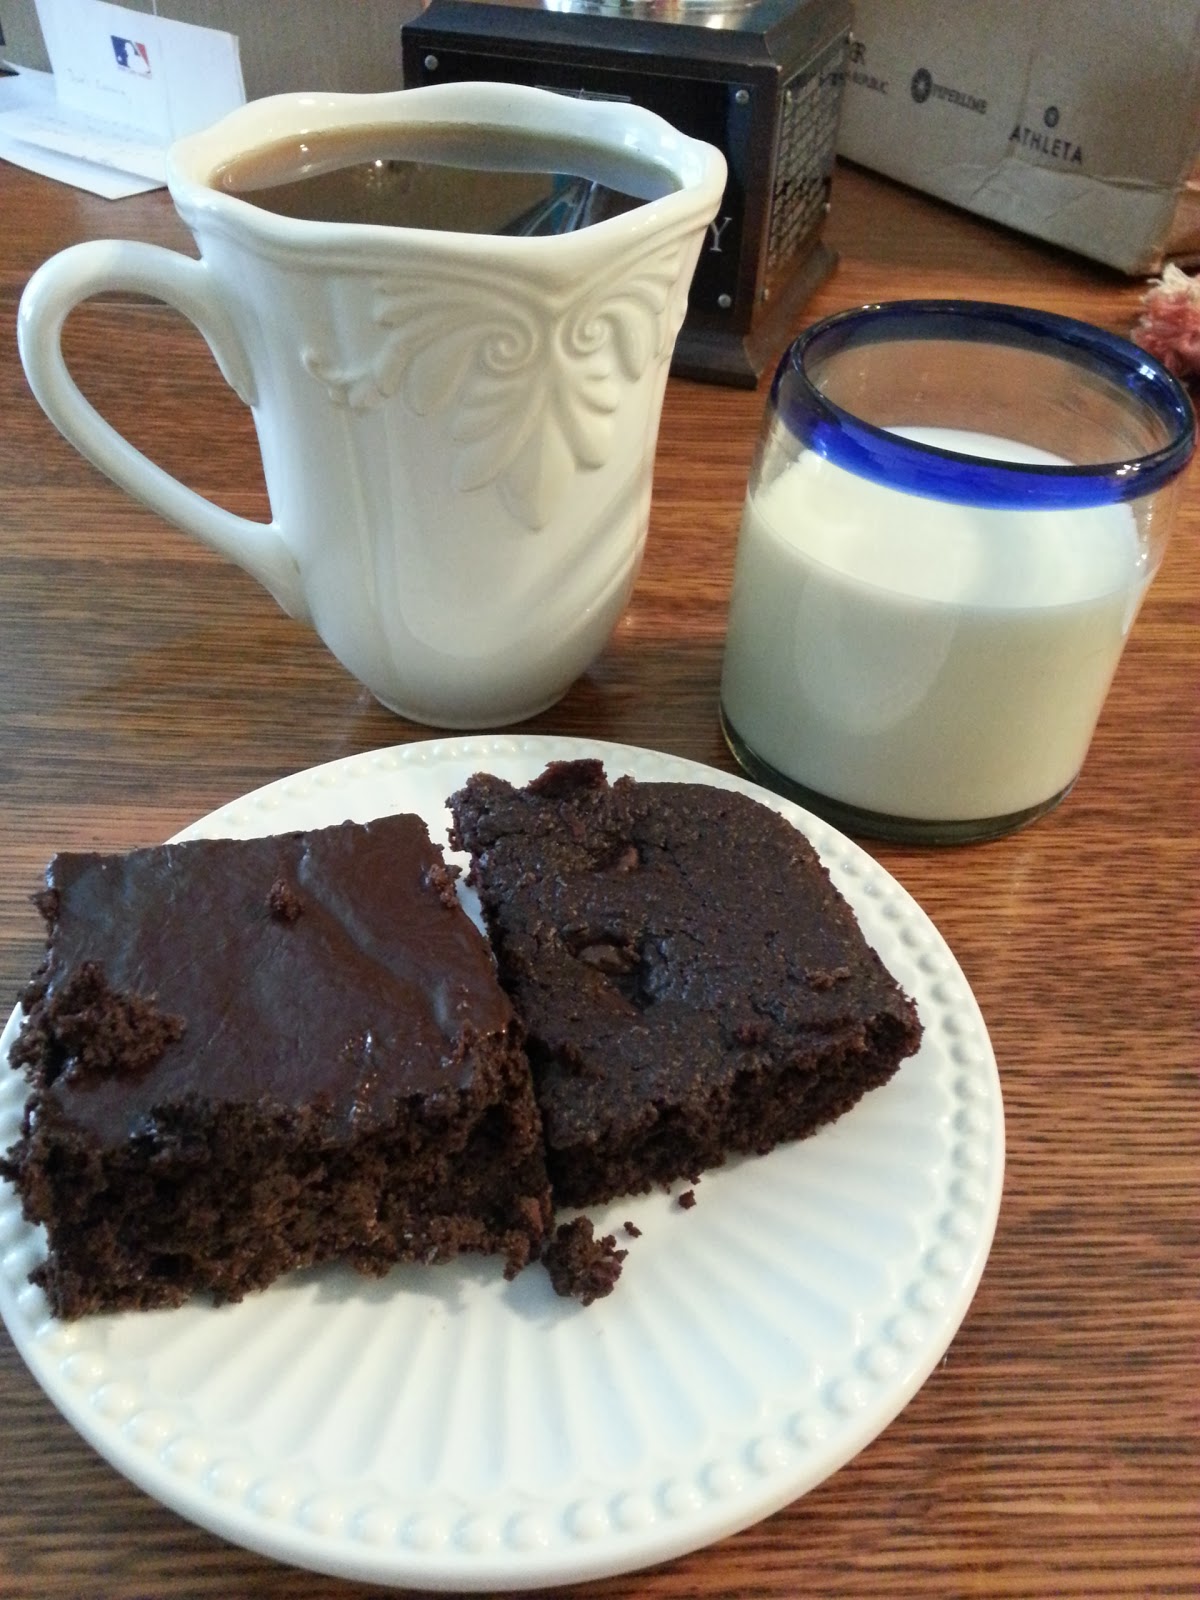
The crazy thing is that this cake is made from quinoa (not quinoa flour, but actual cooked quinoa). So, aside from the sugar, there really isn't anything in it that's bad for you.   I've pasted the recipe in its original form below.  I made two versions to test it out.  The first was as written; the second was using two mashed bananas and a half cup of sugar (instead of the full cup of sugar).  Both versions were delicious, which leads me to believe that this is a relatively flexible recipe.  (The banana one is on the left and the original recipe is on the right in the picture.)  I was feeling lazy and made these each in 9x13 pans this time around, but next time I plan to do cake rounds and layer them up with frosting to make a proper cake.  I can't wait to try them again!!

INGREDIENTS
2 cups cooked quinoa*
1/3 cup unsweetened almond milk (or preferred milk)
4 whole eggs
1 teaspoon vanilla extract
1/2 cup Earth Balance, melted (or butter)
1/4 cup melted coconut oil
1 cup white sugar
1 cup unsweetened cocoa powder (I used Hershey’s Special Dark)
1/2 teaspoon baking soda
1 and 1/2 teaspoon baking powder
1/2 teaspoon salt

Whipped Chocolate Coconut Cream Frosting
1 (13.5 ounce) can of full fat coconut milk, refrigerated/cold
1 (10 ounce) bag chocolate chips

INSTRUCTIONS
  1. Preheat the oven to 350°F and then line two round cake pans (or a 9x13” pan) with parchment paper.
  2. In a food processor or blender, combine the eggs, almond milk (or preferred milk) and vanilla extract then blend for ten seconds to combine.
  3. Add the cooked and cooled quinoa along with the melted and cooled Earth Balance and coconut oil (could also use all regular butter) then blend until completely smooth, about thirty seconds to one minute.
  4. Sift together the dry ingredients in a large bowl (cocoa powder, sugar, baking powder, baking soda and sea salt).
  5. Add the wet ingredients in the blender to the bowl with the dry and mix together until well-combined.
  6. Divide the batter between the two pans and bake for 30 minutes. Remove the cakes from the oven and allow to cool.
  7. To make the frosting you will need to refrigerate the coconut milk overnight (in the coldest part of your refrigerator) so that the cream separates.
  8. When you are ready to make it, melt the chocolate in a sauce pan over low-medium heat. Grab the coconut milk from the refrigerator but don’t shake the can or turn it upside down before opening. Open the can and scoop out the solid parts with a spoon, placing them into the pot with the chocolate. It’s okay if it the solid parts on completely separated, just try to get as much of the thicker portions as possible. Melt the coconut cream and chocolate together then transfer to a large bowl that you can later use to whip it in. (note: if the melted chocolate/coconut milk mixture still appears really dark you can add more coconut milk to lighten it up so that the end result isn't bitter)
  9. Allow to cool on the counter then cover and refrigerate for several hours, until thickened. Once it has thickened, remove from the refrigerator and beat on high for thirty seconds to one minute, until a fluffy icing has formed. (I made mine the night before baking the cake).
  10. Transfer the cakes to a surface for icing with the bottom side up. I recommend that you only transfer the cakes once as they are fragile and difficult to hold together once removed from the parchment paper.
  11. Frost the cake and refrigerate until ready to serve. The icing will melt in really warm conditions but should be fine for a few hours in cooler settings.

NOTES
*approximately 1/2 cup dry quinoa will yield 2 cups cooked quinoa.


Tuesday, July 23, 2013

Flourless Chocolate Ricotta Cheesecake Brownies

Gluten-Free Ricotta Brownies with Cherries 

A few weeks ago I bought I big thing of cherries from the farmer's market, but they weren't quite sweet enough to eat on their own.  I also managed to snag a free thing of homemade ricotta while I was there.  So I started poking around the interwebs for recipes I could make using the two.  I stumbled on this recipe from Edible Seattle for gluten free ricotta brownies with a fun cherry compote on top.  I've already made them twice, so I figure this is likely to become a staple around here.  

The brownies are dense and have a flourless torte-like consistency.  The ricotta layer is not too sweet and makes a nice complement to the chocolate.  They're definitely the best when they're right out of the refrigerator cold.  

Ingredients: 
  • Chocolate Layer: 
    • 1 stick (1/2 cup) unsalted butter, plus extra for greasing the pan
    • 4 ounces Ghiradelli's bittersweet chocolate chips (~1/2 cup)
    • 1 teaspoon vanilla
    • 1/4 teaspoon salt
    • 3/4 cup sugar
    • 3 large eggs
    • 1/2 cup unsweetened cocoa powder
  • Ricotta Layer: (Optional)
    • 1 large egg
    • 1/4 cup sugar
    • 1 cup part skim ricotta
  • Cherry Compote: (optional)
    • 1 pound cherries, pitted and halved
    • 3 tablespoons maple syrup
    • Some cornstarch
Preheat the oven to 350 degrees and center a rack in the middle of the oven. Butter an 8” square pan. Line the entire pan with wax paper, and butter the paper. (Next time I might try spraying the wax paper with canola oil, since it still seems to stick a bit more than I'd like with the butter.)

Make the chocolate layer first by melting the butter in a small saucepan over low heat. Remove the pan from the heat, let any bubbles subside, then add the bittersweet chocolate, stirring constantly until completely smooth. Stir in the vanilla and salt, and set aside. Whip the sugar and eggs together in the bowl of a mixture on high until light, about 3 minutes. With the machine on low, add the chocolate and butter mixture in a slow, steady stream, mixing until uniform in color. Sift the cocoa over the batter and fold it in until no dry spots remain. Scoop the batter into the prepared pan and smooth flat with a spatula.

Next, make the ricotta mixture by whisking one egg and 1/4 cup sugar until light. Add the ricotta, and whisk until smooth. Pour the ricotta mixture over the chocolate layer and tip the pan to distribute the filling evenly.

Bake brownies for 35 to 40 minutes, until firm in the center. (They may puff and/or crack, but will settle again when cooling.) While the brownies are baking, make the cherry compote by cooking down the pitted cherries and maple syrup over medium heat until it gets good and mushy, then add some corn starch to thicken things up a bit.  I have no idea how much I added, maybe 1 tablespoon.

Cool completely in the pan, at least 1 hour (we found they were easier to cut and best tasting after refrigerating overnight). To cut, loosen the edges of the brownies with a spatula. Then use the wax paper to pull the cold brownies out of the pan. Place brownies on a cutting board, leaving wax paper on. Slice into 16 squares, and remove paper.


Wednesday, March 13, 2013

Ricotta Lime Pistachio Tart

As you may recall, a few summers ago I was a bit obsessed with lemon curd. I spent the summer making tarts and then basically forgot about it... until now.  Joel and I went to a party a couple of weeks ago and I wanted to bring something, and being the resourceful gal that I am I took stock of the pantry and googled the ingredients. What turned up was a "Pistachio-crusted Lime Ricotta Tart with Lime Curd", which of course I immediately knew would be a future favorite. And being me, I also immediately changed the recipe.  I made a gluten free crust I've been wanting to try, and I substituted in lime using the old lemon curd recipe I new I already liked. I did follow the little directions about the ricotta, sort of.

Of course changing the recipe meant that I didn't end up having all the things I needed, which meant sending Joel to the store the next morning to get the missing items, which meant scrambling at the last minute after work to put it all together before rushing over to the party. Thankfully, it was freezing outside, which meant the tart had plenty of time to cool on the walk over.

So, here's the bits and pieces in the order I prepped them. I made crust first and let it cool while I prepped the curt and ricotta filling. Then I layered 'em up and let the whole thing cool together on the walk over and then in the fridge for about an hour when we got there.  I'm thinking next time I'll skip the 30 degree walk and just go with the fridge straight up ;-)


Almond/Oatmeal Pie/Tart Crust
Many thanks to The Suburban Girl Gone Country for introducing me to this amazing gluten-free pie crust. It tastes a bit like shortbread, but is hands down the easiest and best pie crust substitute I've found to date.


Ingredients:
* 1 cup of oat flour (I just ground old fashioned rolled oats in cuisinart)
* 1 cup of almond meal
* 4 tbsp butter (softened or melted)
* 2 tbsp pure maple syrup
* 1/8 tsp salt

Instructions

  • Preheat the oven to 350. (The Suburban Girl recommends lining a pie plate with parchment paper, but I used a springform pan and found I didn't need it for that kind of pan.)
  • Mix the butter, maple syrup, and salt  in a large bowl with a fork.  Add 1/4 of the oat flour and stir and mash, continue to add a bit at a time while stirring and mashing (this will help the butter even out easily).
  • Next add the almond meal and stir and mash. Use your hands to insure that butter is worked evenly.
  • Press the dough into springform pan (or prepared pie dish). 
  • Bake at 350 for 10 minutes if you are going to bake a pie or 15 minutes if you are going to fill the crust with a no-bake filling.


Ingredients: Lime Curd

* 3 large eggs
* 3/4 cup granulated sugar
* 1/3 cup fresh squeezed lime juice (2-3 lemons) (do not use the bottled lemon juice)
* 4 tablespoons unsalted butter (room temperature is best)
* 1 tablespoon lime zest

Bring water to boil in a saucepan. While waiting for water to boil, whisk together eggs, sugar, and lime juice in a stainless steel bowl until blended. Place stainless steel bowl with egg mixture over saucepan and cook, stirring constantly (to prevent it from curdling), for approximately 8-10 minutes, until the mixture becomes thick (like sour cream or a hollandaise sauce). Remove from heat and immediately pour through a fine strainer to remove any lumps. Cut the butter into small pieces and whisk into the mixture until the butter has melted. Add the lime zest and cover immediately (to prevent a skim from forming). Let cool in refrigerator. The curd will continue to thicken as it cools. Refrigerate for up to a week.


Ricotta Filling

Ingredients:
* 1 small contains of ricotta cheese (475 grams)
* 1/3 cup icing sugar
* juice and zest of 1 lime

Prep: In a large bowl, use a wooden spoon to combine ingredients.